Welcome to the DIY Watch Club
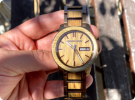
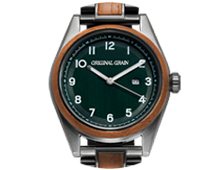
Below are your instructions on how to assemble your Military Barrel 42mm timepiece.
Follow the set of instructions below to build your watch correctly.
If you get stuck at any point refer to our FAQ found below.
DIY Instructions
How to Assemble Your Watch
Please watch this video before assembling your watch!
It's important to have a clean, well lit area. Take your time & enjoy. If at any point you need more assistance refer to our FAQ below or email us at support@originalgrain.com.
Assembly Steps
1
Lay Out Tools & Components
2
Assemble Movement & Case
3
Connect Band to Case
4
Assemble Clasp to Band
5
Size Watch to Wrist

What's in the Kit?


FAQ's
Why can't I get place my battery into the watch?
If your battery is not properly setting into your watch, you will want to push one side of the battery into the slot. Once one side is set use your screwdriver to pull up & gently pry the slot open so that the battery slides into place. Gentle is the key word here. Your battery should slide into place.
My watch is put together but not ticking, what do I do?
If your watch is put together & not ticking the battery & movement may have shifted during assembly. Don't worry you have not failed & this tends to happen sometimes. You can watch this video while following instructions below. You will need to re-assemble the battery & movement. The best way to do this is to:
1) Open the caseback using your screwdriver
2) Will need to remove the crown, You can do this by carefully taking the link pin tool & applying pressure on crown release hole. Crown need to be pushed all the way in while applying pressure. As you apply pressure slowly pull on crown & you will feel it start to release. If it's not releasing push crown all the way in & apply pressure again. (Repeat)
3) Once crown is removed, Pull plastic movement holder with movement outside of watch case.
4) Remove movement holder from movement.
5) Remove battery & reassemble battery.
6) Before putting movement holder on movement to secure battery you should see the second hand start ticking while holding the battery in.
7) After second hand starts to tick apply movement holder & place back inside case.
8) Insert crown in case.
9) Re-attach caseback w/ screws.
Video url : Copy into web browser to view.
My Band is falling apart while I'm assembling or after I've put together?
If your band is falling apart the link pins need to be inserted so that the band is secure. We've created a video below that you can follow along with the instructions that follow.The best way to assemble your band is:
1) Turn the band upside down so you can see the bottom. Underneath you will find arrows that show the direction the link pins should be pushed out.
2)Since you need to push the link pins back towards the arrow.
3)On the link pin you will find a side that is solid & a side that is split end. You need to insert the pin towards the arrow with the solid side, the split end in towards the last part to enter into the band.
4) After you put your watch in the watch stand with the arrows point up, Align the pin with the hole & gently push the pin in with your hands & give it a few taps with the Hammer & Link Pin Tool.
5) Your links should be assembled, Repeat on sections that need to be secured.
You can watch the video here :
How do I add more Links
To add or remove links is a simple process that is needed to fit most wrists. We've created a video below that you can follow along with the instruction that follow.The best way to assemble your band is:
1) Turn the band upside down so you can see the bottom. Underneath you will find arrows that show the direction the link pins should be pushed out.
2)If you need to add or remove links the first thing you will need to do is open the band so that you have space to add or remove links.
3) Put your watch in the watch stand with the arrows point down, You will need to make sure the holes on the watch stand align with where the pins will push out.
4) Align the pins with the hole on stand & gently taps the link pin tool with the Hammer.
5) After a few taps the link pin will start to push out, you can pull the watch out & remove the pins by hand.
6) Your watch will then expand & be open. You can then add a single link or continue to remove links by doing step 4 & 5 above.
7) To add a link, you will align a new links with the band so you can extend the band.
8) Turn the band upside down so you can see the bottom. Underneath you will find arrows that show the direction the link pins should be pushed out.
9)Since you need to push the link pins back towards the arrow.
10)On the link pin you will find a side that is solid & a side that is split end. You need to insert the pin towards the arrow with the solid side, the split end in towards the last part to enter into the band.
11) After you put your watch in the watch stand with the arrows point up, Align the pin with the hole & gently push the pin in with your hands & give it a few taps with the Hammer & Link Pin Tool.
12) Your links should be assembled, Repeat on sections that need to be secured.
You can watch the video here :
I can't figure this out, I need help!
If you have watched the video a few times & can't get it right. No worries it happens & you may need an additional set of eyes. We recommend emailing us so we can walk you through any steps that may be missing.
Email us at Support@originalgrain.com & mention which DIY kit you have and where you're stuck at. Another option would be to take the watch to a local watch shop, these guys have a ton of experience & could be worth a conversation with someone local. Watch building is a community & there should be no judgement on the level we are all at.
What's the warranty on my watch?
Each of our watches come with a 12 month manufactuers warratny, You can find more about what this entails here: https://support.originalgrain.com/hc/en-us/articles/360011740653-Manufacturer-s-Warranty-Policy
We also offer an extended warranty that will allow you to warranty your watch for 24 -48 months. If you didn't see this at checkout or in your emails. Let us know & we can set you up with an extended warranty. Email us at support@originalgrain.com
A Message From Our Founder

We like to create watches that tell more than time. Each timepiece carries unique history & tradition. Making this watch piece by piece was the best way for us to get our customers involved in this process. We hope you enjoy a little time well spent.









 Bob Marley
 Taylor
 TRD
TRD
